
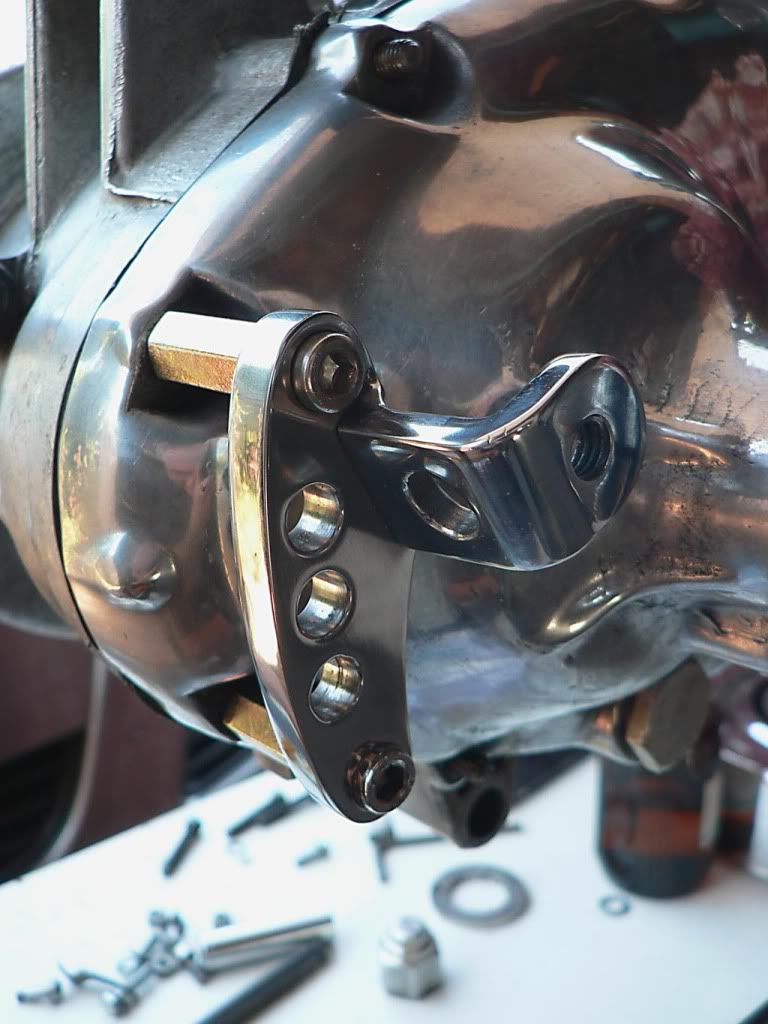
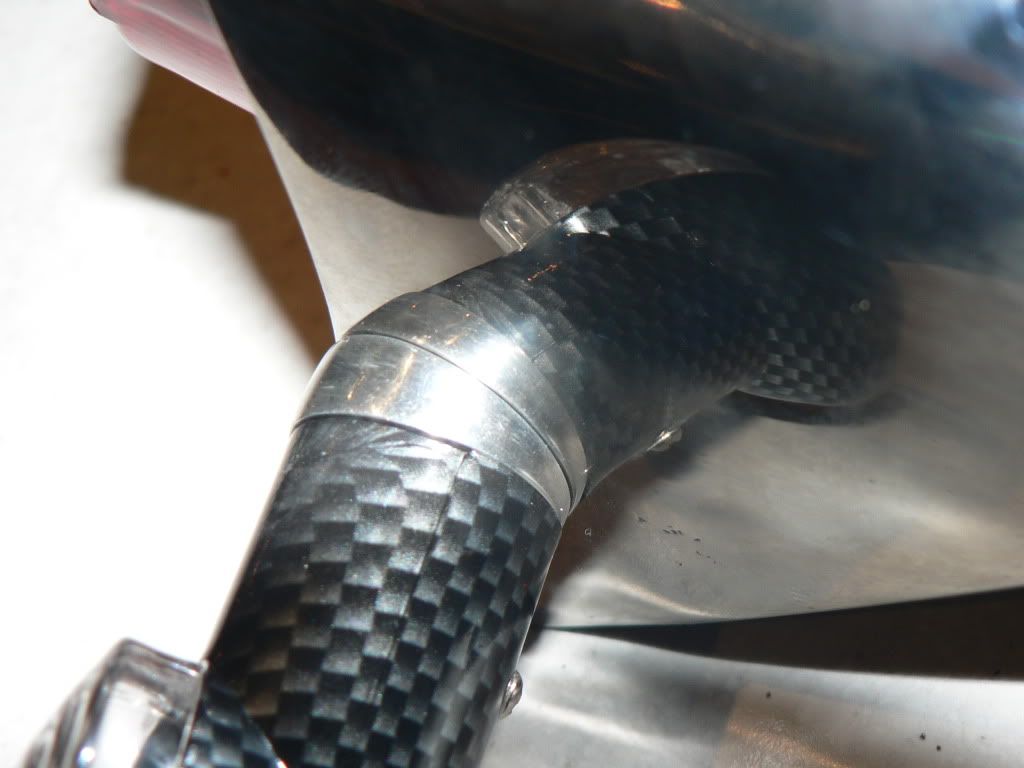
Thanks, if you like the little details, you'll like the bracket I made up to mount the end can on the JL3. The standard one is so ugly! :barfy:RICSPEED wrote:cool .. nice scoot mate .. love the little details too
My Li225 Special
-
Minority
- registered user
- Posts: 673
- Joined: Wed Feb 01, 2012 2:00 pm
- Main scooter: Li230 S3
- Location: Perth, Western Australia
- Contact:

-
Barry Smyth
- registered user
- Posts: 37
- Joined: Fri Aug 13, 2010 12:53 am
- Main scooter: Lambretta Series 3 Li150 '64
- Contact:
Thanks John, Just saw the great list for the indicators, could you please share the wiring diagram and anymore detail? Thanks in advance. Barry
Barry
Barry
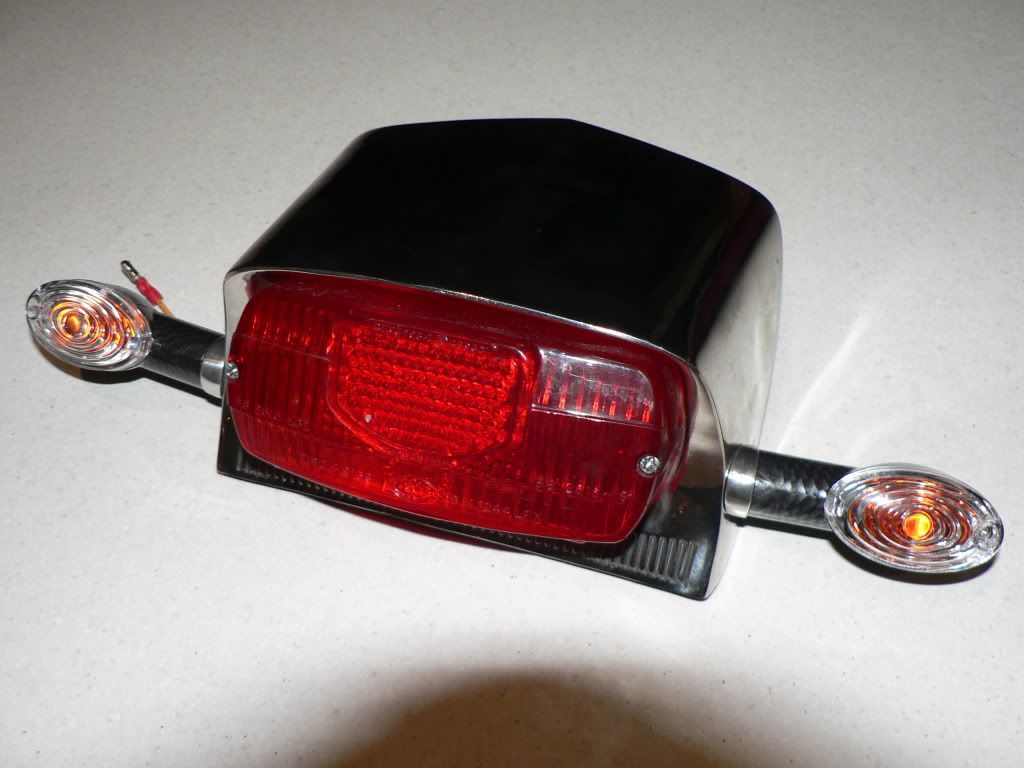
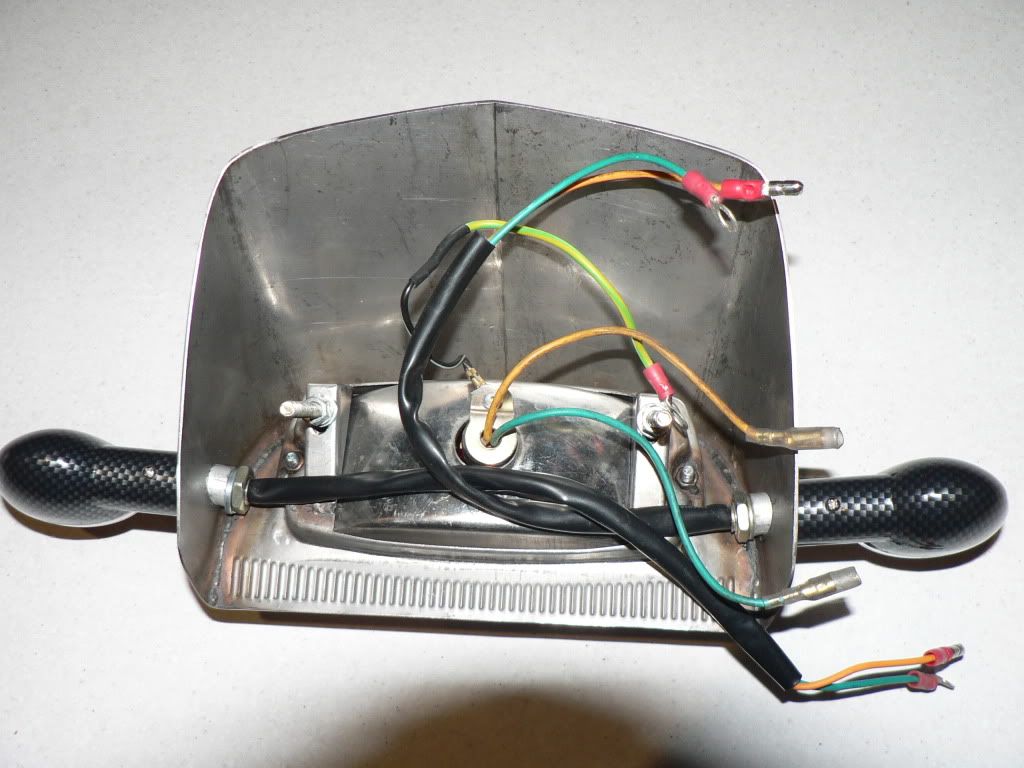
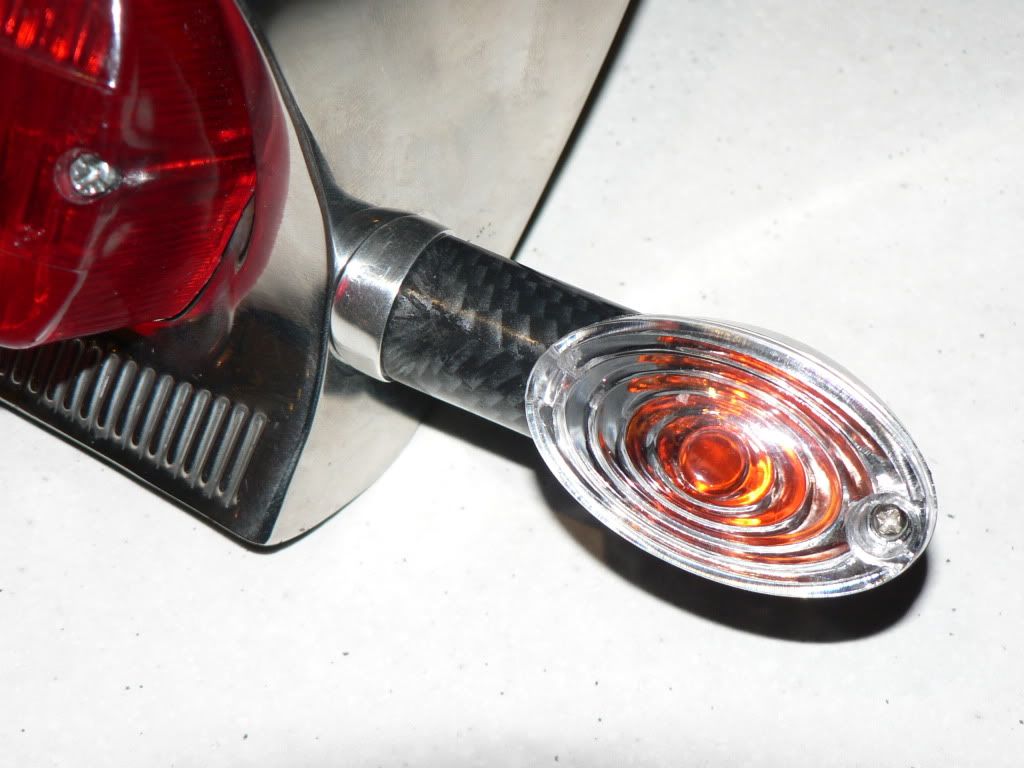
Minority wrote:Here you go Barry, If you have the original SX rear light I don't know how much room you would have. As you can see I have a stainless steel unit (Isn't stainless a bugger to drill!). The most time consuming part of the fitting was making the little alloy spacers to compensate for the slope/angle of the rear light housing. I ended up making them out of a solid peice of ally.
The indicators I used were these ones:
A grand total of A$3.50 delivered! I tried some led indicators but they weren't bright enough for daytime use (I think these ones should be OK but I've only just fitted them so I'm not sure)
If you have any questions please let me know.
John
-
sparklymarkly
- registered user
- Posts: 299
- Joined: Wed Jan 04, 2012 6:33 pm
- Main scooter: Lambretta GP
- Contact:
Nice work on the indicators.
Just done exactly the same thing on mine - those spacers were awkward!
Just done exactly the same thing on mine - those spacers were awkward!
-
Minority
- registered user
- Posts: 673
- Joined: Wed Feb 01, 2012 2:00 pm
- Main scooter: Li230 S3
- Location: Perth, Western Australia
- Contact:
Looks nice! I think this is the best place for them on a lammy without being too obtrusive (if you don't mind drilling holes in your rear light. :biggrin: )sparklymarkly wrote:Nice work on the indicators.
Just done exactly the same thing on mine - those spacers were awkward!
What are you doing at the front? I drilled a couple of holes in the lower part of the headset either side of the headlamp and mounted them there, again not to obtrusive.
-
Minority
- registered user
- Posts: 673
- Joined: Wed Feb 01, 2012 2:00 pm
- Main scooter: Li230 S3
- Location: Perth, Western Australia
- Contact:
Thanks Eden, it'll be even better when I get the engine back in the scooter.eden wrote:Thats a cracking idea
some nice details on this scooter :fb:
One of the problems of being in Perth, Western Australia is the time it takes to get stuff from the UK, so my rebuild has taken much longer than expected. The deeper and deeper I went, the more I found I needed! Hopefully the gearbox shim I am waiting for is the last bit.
Then I can have the fun of running in the new piston & rings. :biggrin:
-
Minority
- registered user
- Posts: 673
- Joined: Wed Feb 01, 2012 2:00 pm
- Main scooter: Li230 S3
- Location: Perth, Western Australia
- Contact:
Hi Stu, I am really pleased with the way that the sensor bracket worked out, the sensor ends up in a fairly protected position and cables etc will be pretty well hidden (especially with the panels on). The bracket gets pretty close to the wheel rim (SIP tubeless in my case), but there is enough clearance and I could have easily made it a bit narrower in that area if needed. The other issue is that it might be impossible to drill & tap the rear suspension mount with the engine still mounted in the frame.stu69 wrote:Looks very nice, and some trick bits. I may have to put a return spring on mine. Your rear sensor bracket looks good, does it work ok, and do you have any tips on making one?
I carved it out of a solid chunk of ally and the only tools used were a hacksaw, drill and hand files (oh and a buffing wheel to polish it).
One thing I gave no thought to (but should have) was how close the gear lever would get in 4th gear! Fortunately it was OK and I took a bit more off the stainless steel tie rod too make sure. If you were running a standard tie rod with the little rubber boot on you would have to be more carefull.
The front forks now look a lot "cleaner" without the speedo cable looping around and I plan to take off the speedo drive cover when I put on the antidive upgrade.
Last edited by Minority on Mon Nov 05, 2012 9:20 am, edited 2 times in total.
-
sparklymarkly
- registered user
- Posts: 299
- Joined: Wed Jan 04, 2012 6:33 pm
- Main scooter: Lambretta GP
- Contact:
I've fitted them down at the bottom of the horncasting. They look quite subtle there (they're white until lit up) & I'm pleased with the result.Minority wrote:What are you doing at the front? I drilled a couple of holes in the lower part of the headset either side of the headlamp and mounted them there, again not to obtrusive.
Can't post a pic yet - it'll give the game away! Don't want to put any paintwork pics up til it's finished!
I was going to put them underneath the handlebars using special brackets bolted through the headset top bolts but in the end decided it was too much hassle!