

Model C transmission
still trying to dismantle the tranmission on my model c. I´ve managed to remove the nut (N.r4) and the circlip (Nr.3) but how do I get the rest out. thought of putting the nut (Nr.4) back on and pull it all out. is this the correct way?
I´m bringing this up again, managed to get all the gears and stuff out but the actual swinging arm wont´t come off. Any ideas?
u need to pm frank osgerby, on here as red devil, i think,
as he has a c, and may b ok to help u,
as he has a c, and may b ok to help u,
Hi folks, I've just seen this thread and my name mentioned!! I'm afraid my computer has been out of action for a while so I apologise for any delay.
As its quite late I'll reply tomorrow and will describe what has to be done to remove the swinging arm. I would suggest that if the brass bushes show no sign of wear I would leave well alone but if you have no choice then fear not I will explain.
Frank.
As its quite late I'll reply tomorrow and will describe what has to be done to remove the swinging arm. I would suggest that if the brass bushes show no sign of wear I would leave well alone but if you have no choice then fear not I will explain.
Frank.
Hi Frank,
cant´t wait for someone to bring some light into this. The swinging arm got a little play but as I´ve dismantled the whole transmission so far I might as well go the full length and replace the bronze bushes.
Looking forward to get some help.
marc
cant´t wait for someone to bring some light into this. The swinging arm got a little play but as I´ve dismantled the whole transmission so far I might as well go the full length and replace the bronze bushes.
Looking forward to get some help.
marc

Right Marc, first of all I must explain that this is one job I have never done before, when I restored my own model C I got halfway through the process and chickened out due to two things....lack of information and the fact that my engines swinging arm rotated nicely without any play, since then Markg sent me a copy of a Pitmans manual which covers this area, unfortunately I could not include it as a scanned document as the print quality is so poor.
As you would expect this area of the transmission requires a number of special tools to extract and refit the bearings and bevel gears but as with most things on any engine there are ways around these. So you may have to make up some bits in order to pull out bearings for example which can be awkward when fitted tightly into the housing.
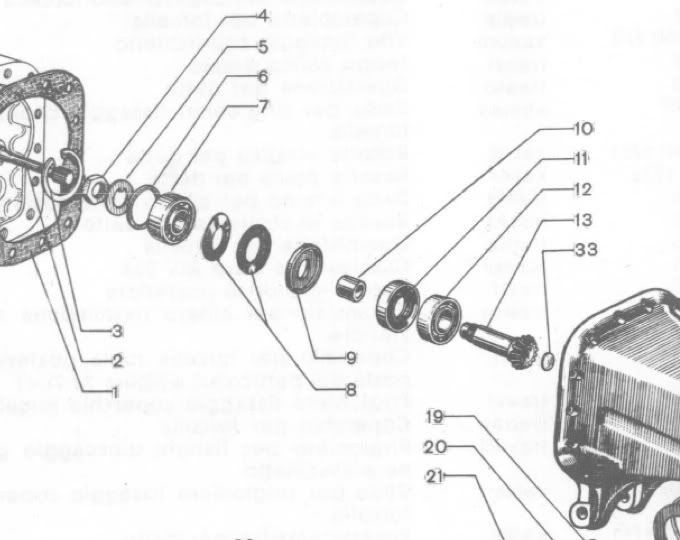
First of all you need to extract the final drive shaft with its bearing and oil seal No. 11,12 and 13 on the parts drawing as this projects through the bronze bush. Remove the circular cover plate on the offside of the swinging arm and wipe away any excess grease so that you can see what is beneath.
This is what the manual has to say.
Once the final drive shaft is removed the bevel pinion and its supporting bearings will be seen at the bottom of the casing but they cannot be taken out until the final driven pinion bearing ring is extracted (No 21) and the circlip in the casing which holds one of the bearings is removed. A special tool was needed for this but the ring may come loose by heating the housing, the bevel pinion bearing may be a tighter fit which also required another tool but it says a screwdriver entered through the greaser plug may be used to gently lever it out.
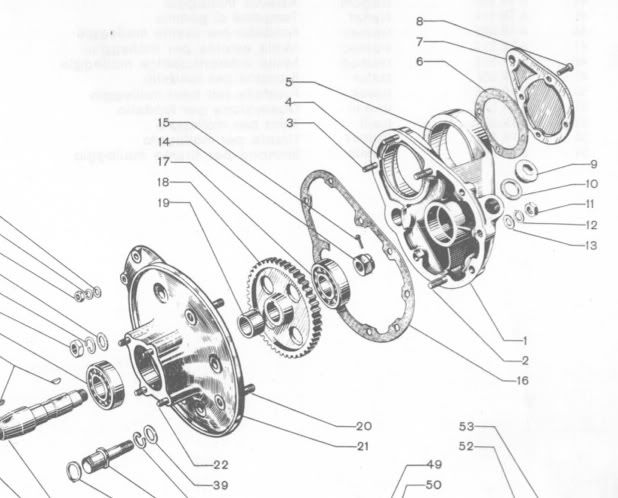
When the circular cover plate is removed and excess grease wiped away the bevel gear adjustment nuts can be seen the top one (locking nut) is circular with a slotted groove this will need a forked scewdriver blade to slacken and remove, the second nut lying beneath is 19mm spanner size. It is easier to gain acess to this by taking out the circlip and bearing ring and 3 washers No 19,20,21,22,23and 24. Hopefully the bearing on that side can be levered out as previously explained No 26.
To dismantle further the hub brake shoes and backplate must be removed, the pivot bearing bush can be tapped out to the nearside, bringing with it the bevel gear assembly. The short bush can be easily slid out to the offside. Reassemble all parts with plenty of grease and use the 19mm nut to adjust the bevel gear clearance locking it in place with the circular nut.
Good luck Marc and please let me know how you get on. I am keen to know if this is possible without access to any special tools.
All the best.
Frank.
Hi Frank,
thanks for your answer, I have dismantled the whole thing already including building my own extractor to pull out the final drive shaft, etc. I´m left now with the bare casing.
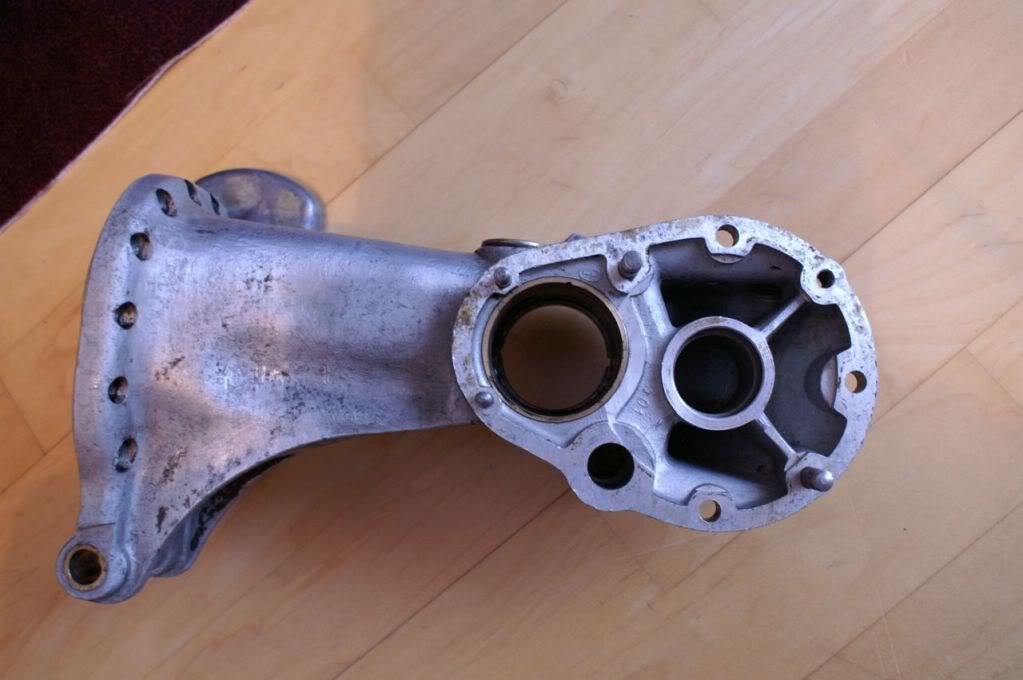
The next problem is how to get the actual swinging arm (No.1) off?
My next worry is if I have to replace the bronze bushes where I can get some or do I need to have them remade?
By the way the rest of the bike is already finished since last summer, after I had it registered and took it for a good ride the knuckle started leaking!

thanks for your answer, I have dismantled the whole thing already including building my own extractor to pull out the final drive shaft, etc. I´m left now with the bare casing.
The next problem is how to get the actual swinging arm (No.1) off?
My next worry is if I have to replace the bronze bushes where I can get some or do I need to have them remade?
By the way the rest of the bike is already finished since last summer, after I had it registered and took it for a good ride the knuckle started leaking!
Well done Marc for getting so far in such a short space of time.
Of course the manual does not cover anything like this, it says the bush on the nearside (the large one) should tap out with the bearing and gears obviously this has not happened!! Can you heat the casing up and tap it out using a brass drift on the opening where the final drive shaft enters the bush?
Failing that do you have access to a lathe? Machine a stepped disc slightly smaller than the diameter of the bush so that it will sit onto the bushes edge, drill a hole in the centre to pass some threaded studding through. You will need a short length of tubing on the other side which is slightly larger than the bush diameter a piece of flat steel also with a hole forms a bridge to allow the studding to be tightened and so pulls both bushes out to the nearside and into the tube.
If you have a look on Vittorio's Casa Lambretta site for the model C you will find he offers them for sale, the whole thing is in Italian but he uses the same part numbers as in the parts catalogue so its easy to use. Alternatively you could give Howard Chambers a call in the hope he may have some in stock his no. is 02380 550270 daytime only.
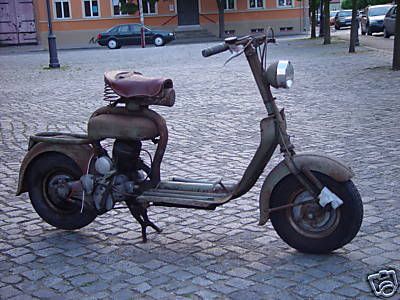
Thanks for including a photo of the scooter its looking really nice. Do you know anything of its history? I hope we will meet at one of the shows in the future.
Keep me informed of progress.
Frank.
Of course the manual does not cover anything like this, it says the bush on the nearside (the large one) should tap out with the bearing and gears obviously this has not happened!! Can you heat the casing up and tap it out using a brass drift on the opening where the final drive shaft enters the bush?
Failing that do you have access to a lathe? Machine a stepped disc slightly smaller than the diameter of the bush so that it will sit onto the bushes edge, drill a hole in the centre to pass some threaded studding through. You will need a short length of tubing on the other side which is slightly larger than the bush diameter a piece of flat steel also with a hole forms a bridge to allow the studding to be tightened and so pulls both bushes out to the nearside and into the tube.
If you have a look on Vittorio's Casa Lambretta site for the model C you will find he offers them for sale, the whole thing is in Italian but he uses the same part numbers as in the parts catalogue so its easy to use. Alternatively you could give Howard Chambers a call in the hope he may have some in stock his no. is 02380 550270 daytime only.
Thanks for including a photo of the scooter its looking really nice. Do you know anything of its history? I hope we will meet at one of the shows in the future.
Keep me informed of progress.
Frank.
It´s not possible to pull both sleeves out to one side because there´s a little step in the casing.
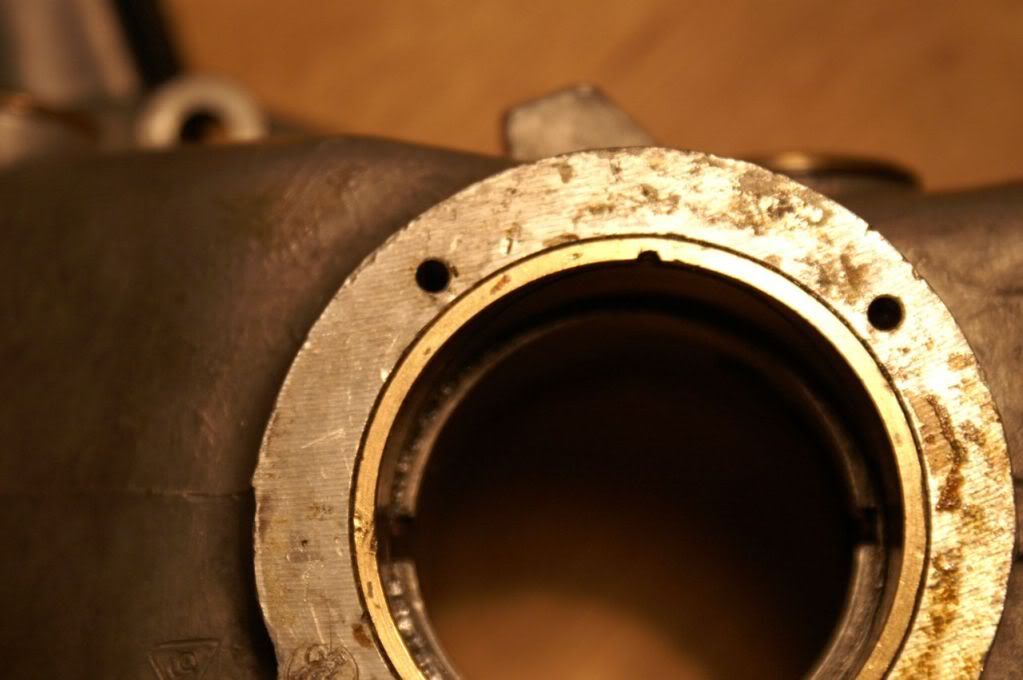
I think I´m going to cut two little grooves in the bushes with a dremel, heat the casing properly and then punch them out from the opposite side with a small chisel.
Can´t say anything about the history of the bike. I´ve bought it about three years ago for 650 Euro from a guy who got it in Italy. It was in quit a bad state, butty box and second seat missing and had the mag housing from a model a fitted.
It´s my first nut and bolt restoration, that´s probably why it´s taken me so long.
OK I did wonder if it was possible to pull both bushes out to the same side as I could see they have some odd shape shown in the parts diagram but having not seen them out I did'nt know for sure. Can I suggest you make some enquiries about obtaining new ones before you get these out just incase you run into problems locating some. They are not run of the mill items if you know what I mean!
Lambretta must have offered another special tool to pull these out if they were tight, as yours are.
Have you dated your machine from the frame number?
I must say you have done a great job so far especially if this is your first attempt at restoration.
Lambretta must have offered another special tool to pull these out if they were tight, as yours are.
Have you dated your machine from the frame number?
I must say you have done a great job so far especially if this is your first attempt at restoration.