Page 3 of 7
Re: Sneak Peak
Posted: Thu Jun 26, 2014 12:54 pm
by ducksta
cheers got me thinking
Re: Sneak Peak
Posted: Thu Jun 26, 2014 6:44 pm
by T5-190
ducksta wrote:cheers got me thinking
I pop the forks back in the frame Friday and take a few more pictures.
Re: Sneak Peak
Posted: Tue Aug 26, 2014 8:48 pm
by T5-190
A small update, I've been working away a bit lately so things have been a little slow in the shed. Been busy making moulds and parts from them too.
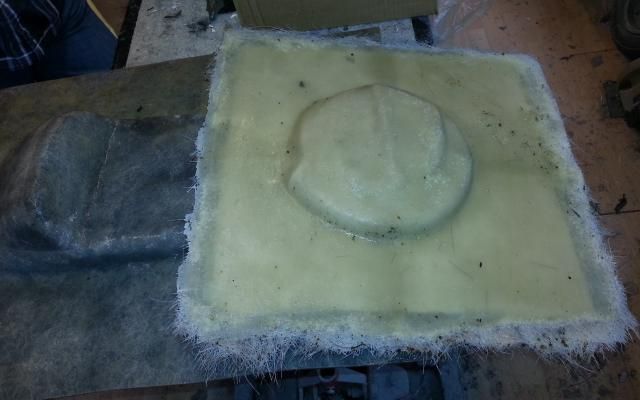
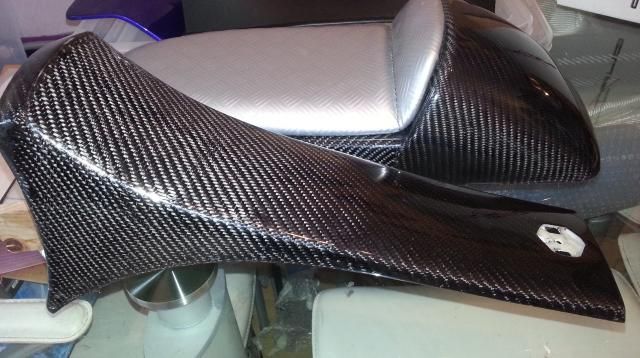
Seat and Turbo flywheel cover mould.
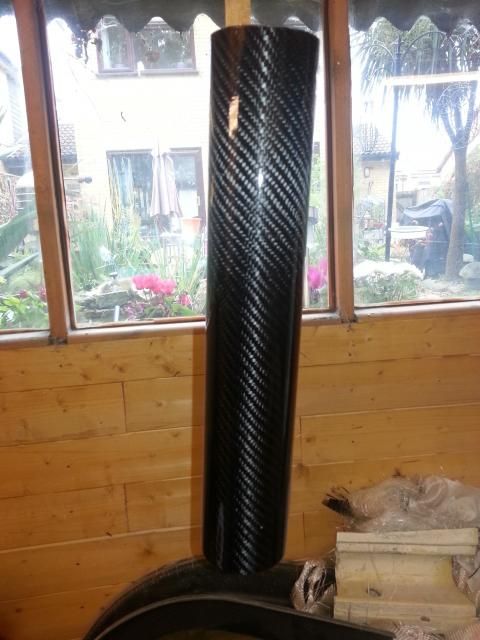
Tube for the tail can.
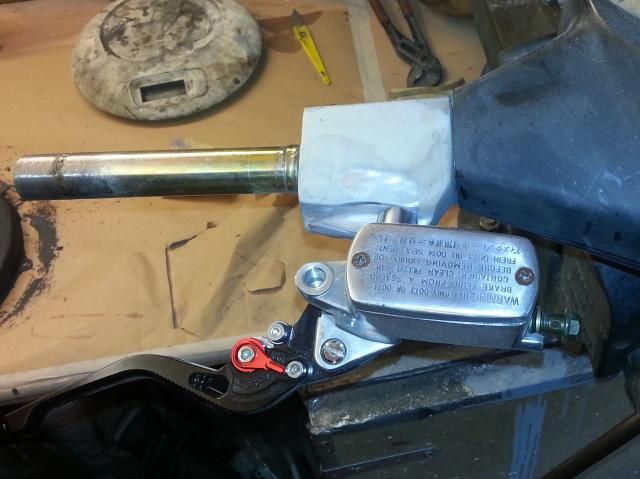
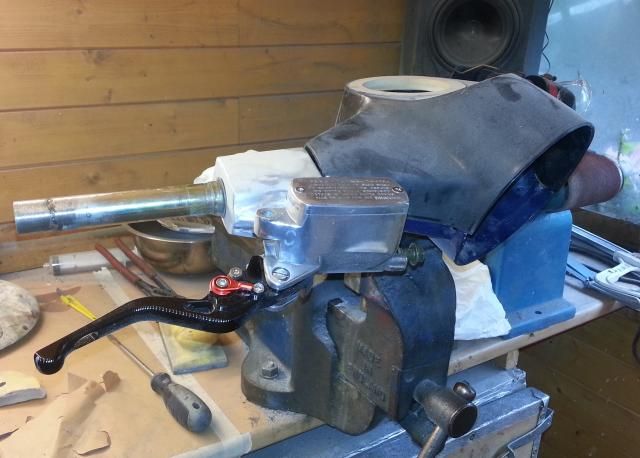
Front brake upgrade, I got the weld on convertion plate from Beedspeed. The master cylinder from ebay for £25, its from a large Honda.
Re: Sneak Peak
Posted: Tue Aug 26, 2014 8:59 pm
by T5-190
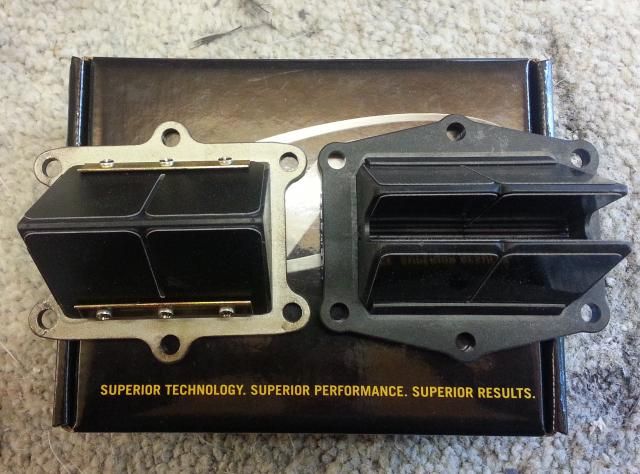
I had to mod the reedvalve manifold, I took the bore from 33 to 40mm and removed the stuffer from the back. This was necessary to use the V-force reedvalve cage.
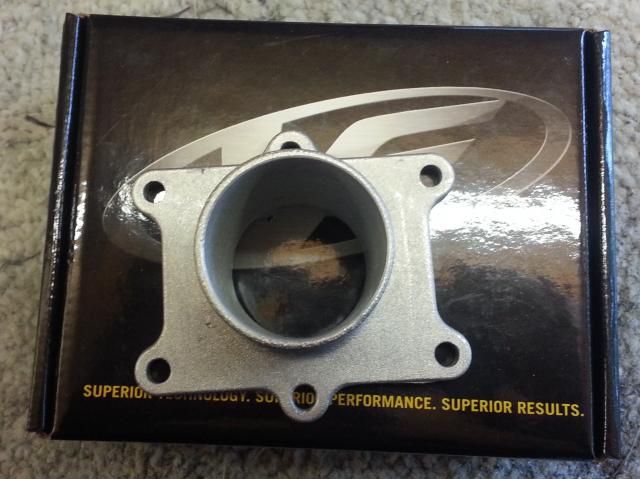
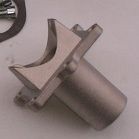
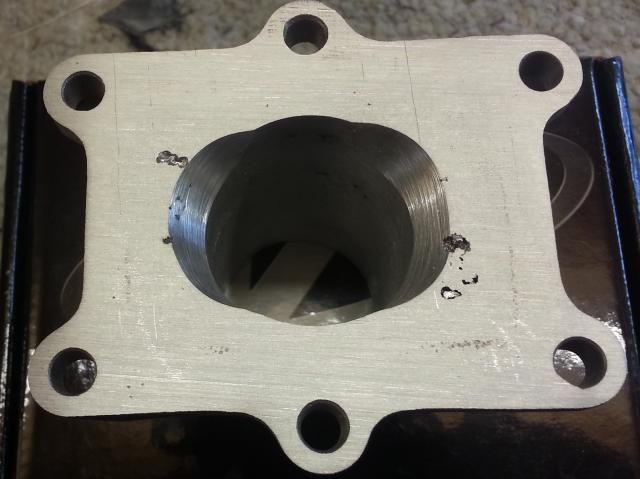
Machined,bored and matched. The casting is a little poor to be honest and maybe a little Devcon needed.
More soon.
Re: Sneak Peak
Posted: Tue Aug 26, 2014 10:44 pm
by Juan
If you've got moulds to make a XL horncover, even in fibreglass, you could potentially be onto a few quids worth of orders. I'd take 2 for a start.
ETS horncovers and headset tops would be something that may also have a small but potentionally worthwhile demand, XL headset also worth copying if you can be arsed.
Re: Sneak Peak
Posted: Wed Aug 27, 2014 4:26 pm
by santacama
Juan wrote:If you've got moulds to make a XL horncover, even in fibreglass, you could potentially be onto a few quids worth of orders. I'd take 2 for a start.
ETS horncovers and headset tops would be something that may also have a small but potentionally worthwhile demand, XL headset also worth copying if you can be arsed.
The seat too.
Re: Sneak Peak
Posted: Wed Aug 27, 2014 5:59 pm
by T5-190
The horncover was a one off to be honest, it is about 50mm longer than a standard one to bring the bottom part closer to the hugger mudguard. I had no idea the XL stuff was getting that hard to get hold of.
Re: Sneak Peak
Posted: Wed Aug 27, 2014 10:49 pm
by Juan
XL stuff can still be gotten but having decent fixing points included is becoming increasingly rare. Got a few horncasts but none in a complete state of affairs and no apparent replacements unless you'll accept the XL2 version which is bulky and ugly. You can try to cast a blind eye but it'll always catch your line of vision as soon as you go near it.
Re: Sneak Peak
Posted: Sat Dec 26, 2015 5:46 pm
by T5-190
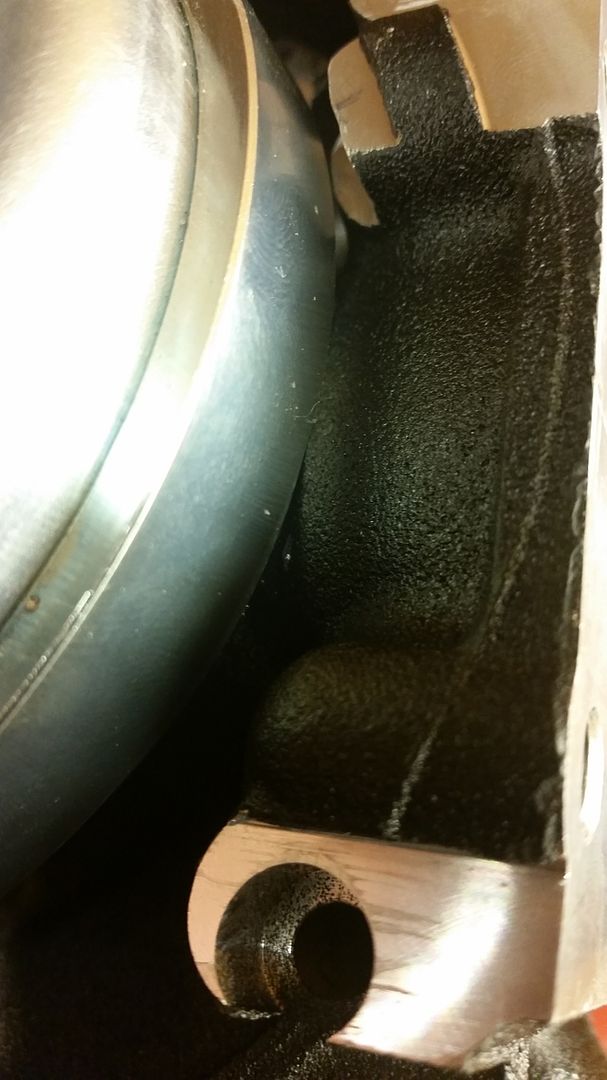
Well it's been a while for this build. But I've been in the shed for a few days over the Christmas break. Work has put the brakes on things for me a lot, been a way alot this year including China, Mexico and Denmark. I powder coated the engine cases in a fine black texture. This makes them look better I think, also the natural finish on the Quattrini cases was pretty shocking really. There were bad casting mark/defects and drag marks too.
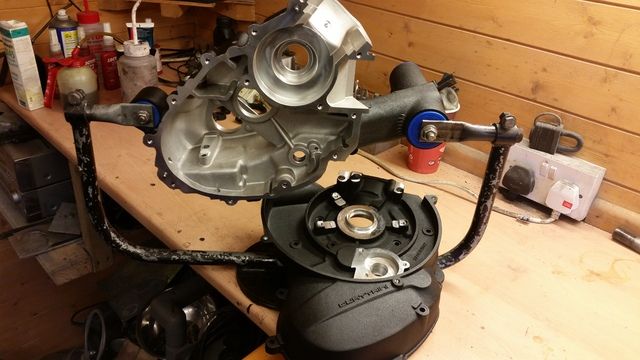
Engine mounts fitted, and bearings in the freezer ready to go in. Also made a pair of nylon main bearing so I can check the timmings/TDC etc.
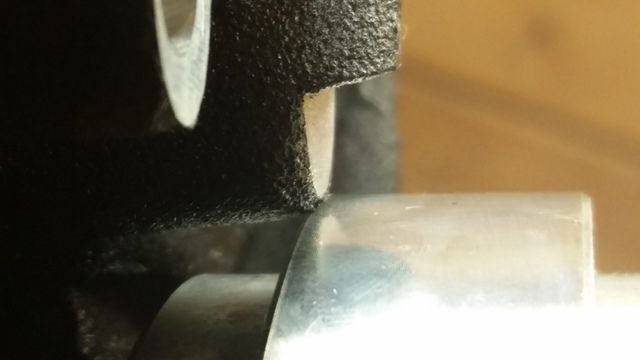
First problem is the flywheel hits on the cases, a little fettling then it hits the next thing on the cases. This time the outside of the tranfer ports.
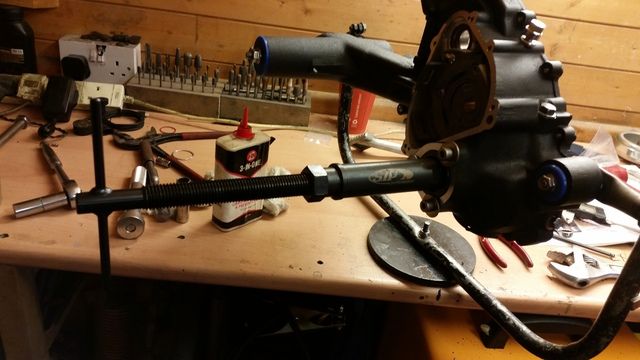
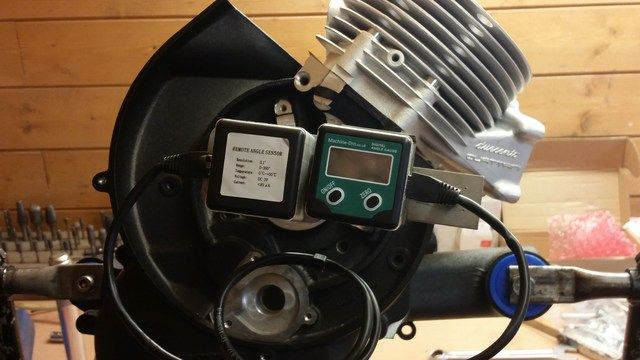
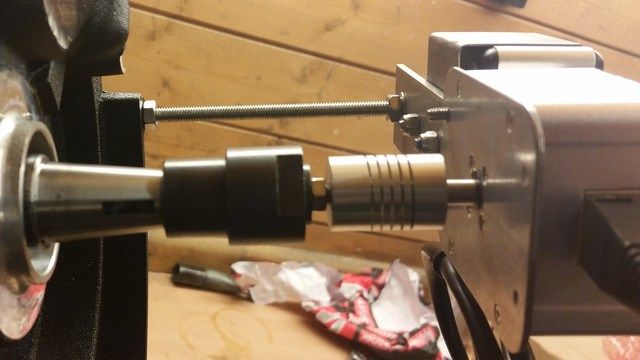
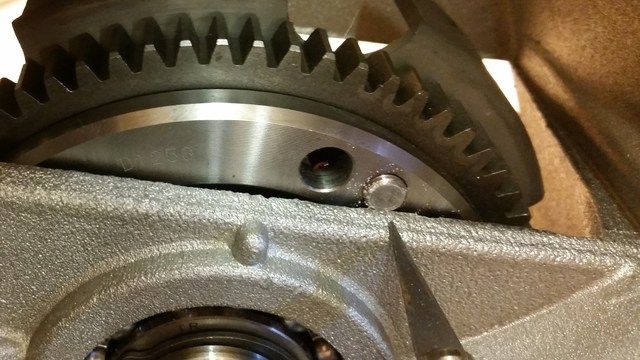
To check the timming I made a digital unit using a rotory encoder and display unit used for lathe and milling tables. Better than using a plastic timming disc and easyer to read, I'm just about on the verge of wearing glasses. All parts available from Ebay etc. The special flywheel nut is made by SIP/Pinasco for a timming disc. All parts come in at under £40. It also has the ability to be zeroed in any possition.
Re: Sneak Peak
Posted: Sat Dec 26, 2015 6:02 pm
by T5-190
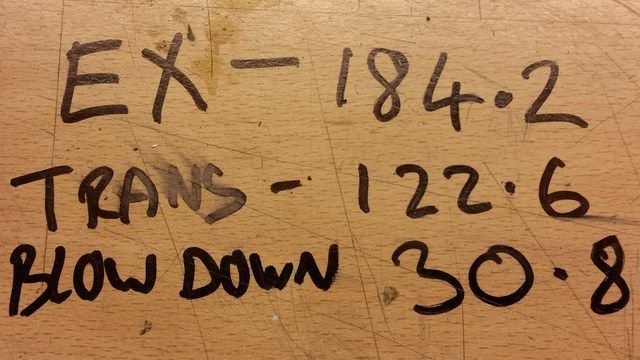
Timming values as follows.
Bearing fitted next all bearing into the freezer over night. Just prior to fitting I put then into a Thermos mug with a lid and give them a blast with an air duster to really chill them down. This and a gentle warm with the blow lamp and they just go in by hand. Never been a real fan of hammering in bearings.
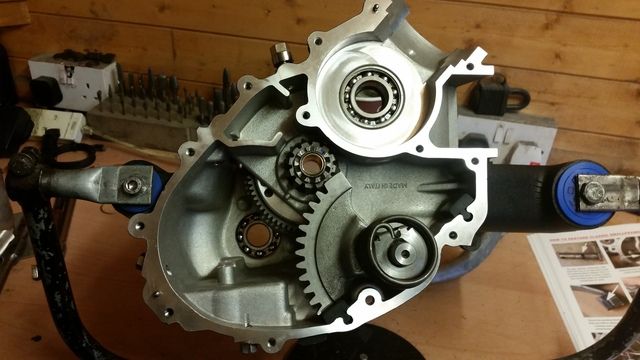
Next problem, the screws from the DRT cluch basket also hit the case. So a bit more filing. The basket was also very, very tight to get in. A real pain to be honest.
New gear shift selector and uprated spring and balls fitted next, also DRT. I like to use two short pieces of 6mm nylon tube and my hand inside a plastic bag for this job. Saves hunting around the shed for ball bearings.
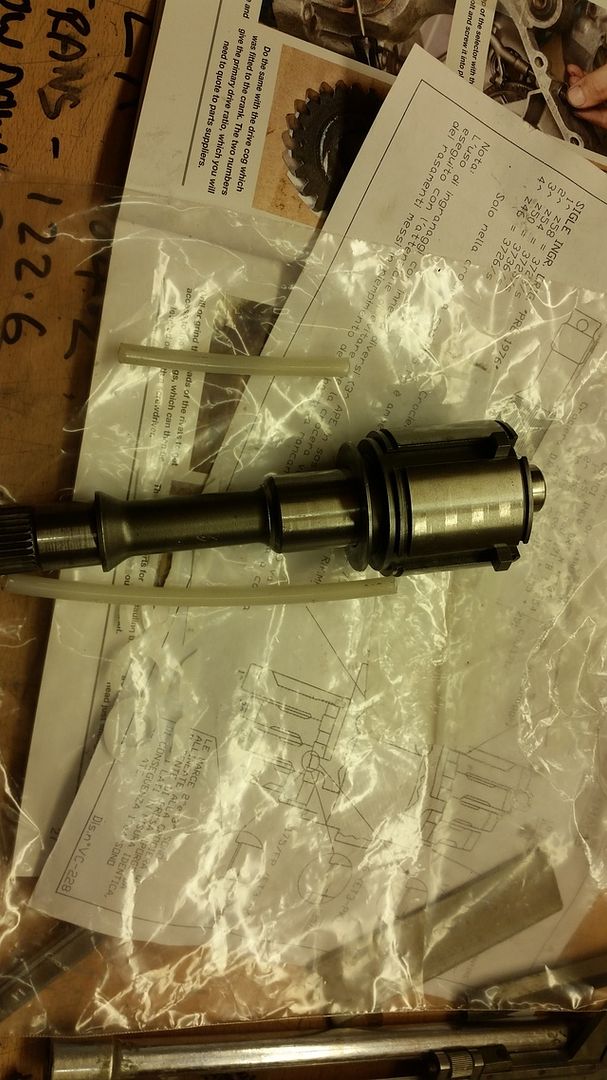
Gear cogs installed and shimmed then the whole shaft pulled in using a multi puller/pusher from SIP. Again never been a real fan of hammering home shafts and bearings.