Ldi or should that be Lid ?

Post pics & videos of your scooter, projects you're working on, a lovely Vespa that you saw at a rally, or anything else scooter related.
User avatar
carlos fandango
registered user
Posts: 792
Joined: Wed Jan 07, 2009 12:51 am
Location: Stourbridge
Contact:

Next up was the leggies
Image
They had a a bit of tin worm in a could of areas, this part being the worse one , i thought i could build up with weld and grind back to shape, but one touch with the welder just blew an even bigger hole :(
Image
A patch repair was the only solution. so a piece of steel , a bit of bar, piece of Oak and a hammer.
Image
Half an hour later
Image
And another half hour :)
Image

My welding is getting better (slightly) with practise . I brought myself a new welding helmet , so i can see what im doing now 8-) and i dont have to keep looking away :)
When i was young my Mom said "if you haven't got anything nice to say, say nothing at all " ..................... and people wonder why I'm quiet around them !
User avatar
jackpot
registered user
Posts: 105
Joined: Sat Jan 10, 2009 12:49 pm
Location: sheffield yorkshire
Contact:

cant wait to see the end result
ON MY SCOOT OR NOT AT ALL
User avatar
carlos fandango
registered user
Posts: 792
Joined: Wed Jan 07, 2009 12:51 am
Location: Stourbridge
Contact:

Well i stalled a bit over Christmas, but had a few hours on it this week :)

First problem was the seat , i havent seen a decent looking alternative seat on a LD. I toyed with altering an old Snetterton i had , but the most comortable position for me, is directly over the filler cap , and with a Snetterton what would of been a little uncomfortable :shock:
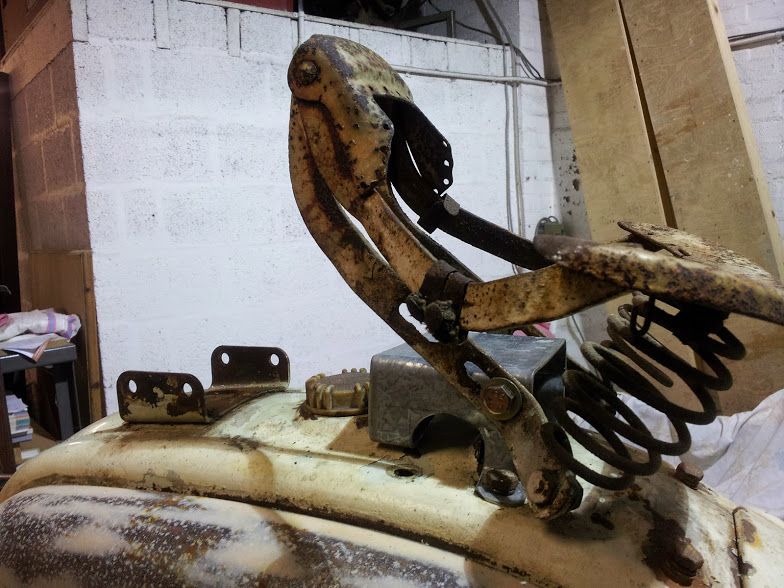
I love the look of the LD front seat with the two springs at the rear, the position is too far forward for me, but the position is again over the filler cap and would be impossible to access the cap :? so i came up with an idea to make the seat tilt. I tried it first with a wooden template, then went on to a carboard template to transfer to some sheet steel and fabricated a bracket .
Image
Image
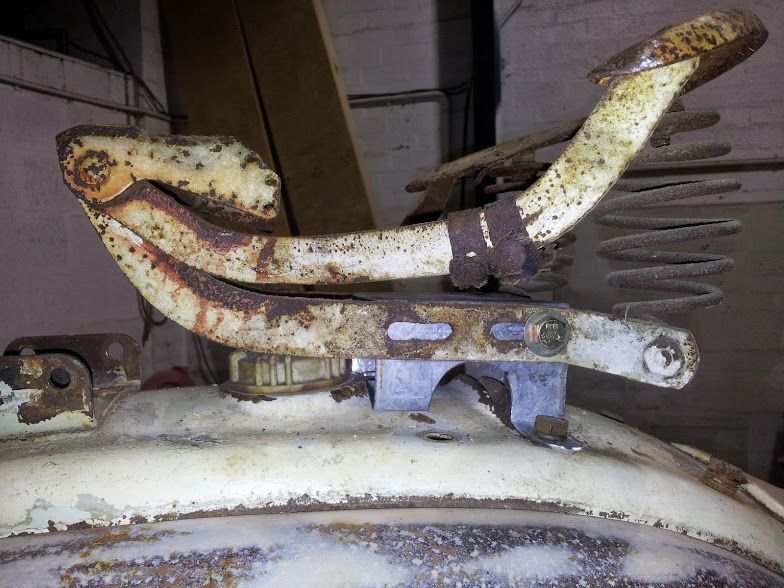
It only needs to tilt by about 25 degrees to gain access to the tank, ive still to make a catch for it and a way to adjust it back and forth a little whilst riding :)
Image
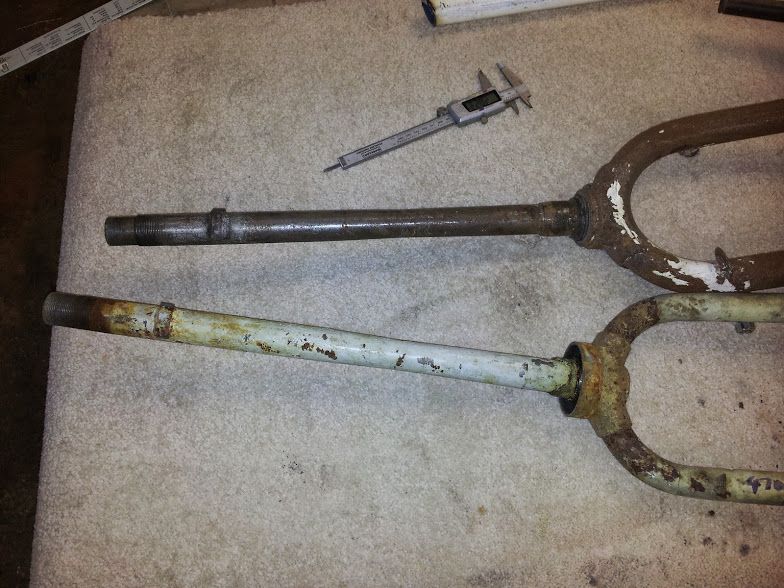
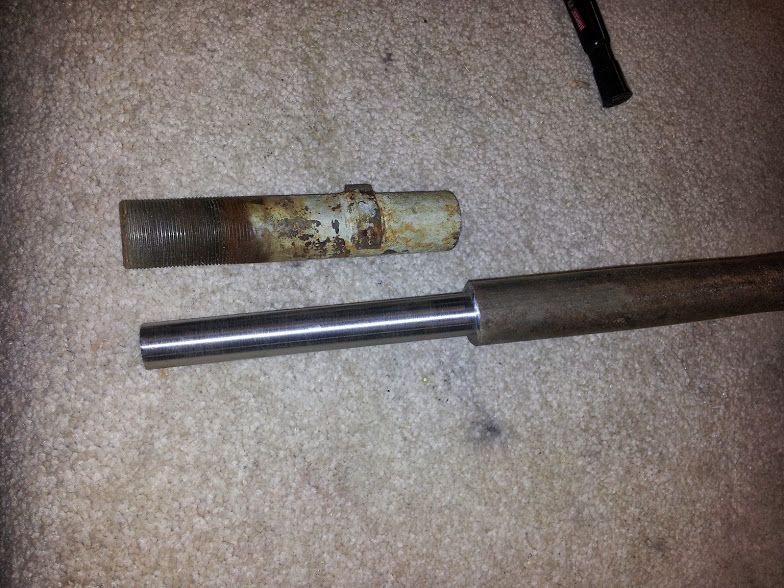
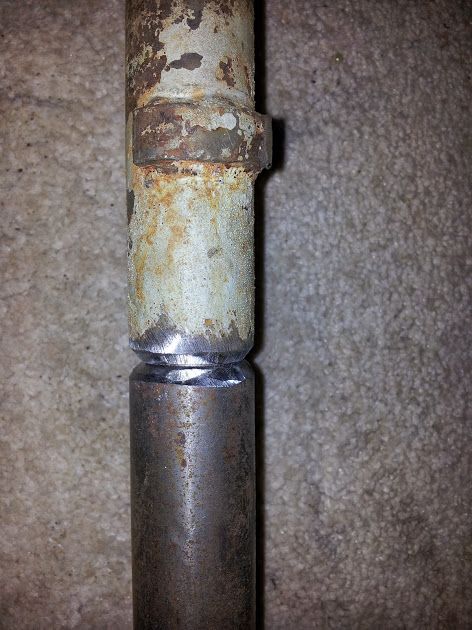
Another job was the fork stem, this is too short by around 12mm to reach the top of the leggies. So i found a bit of scaffold tube, turned down the id a little to get the chrome ring and race to fit , and tacked in place.
Image

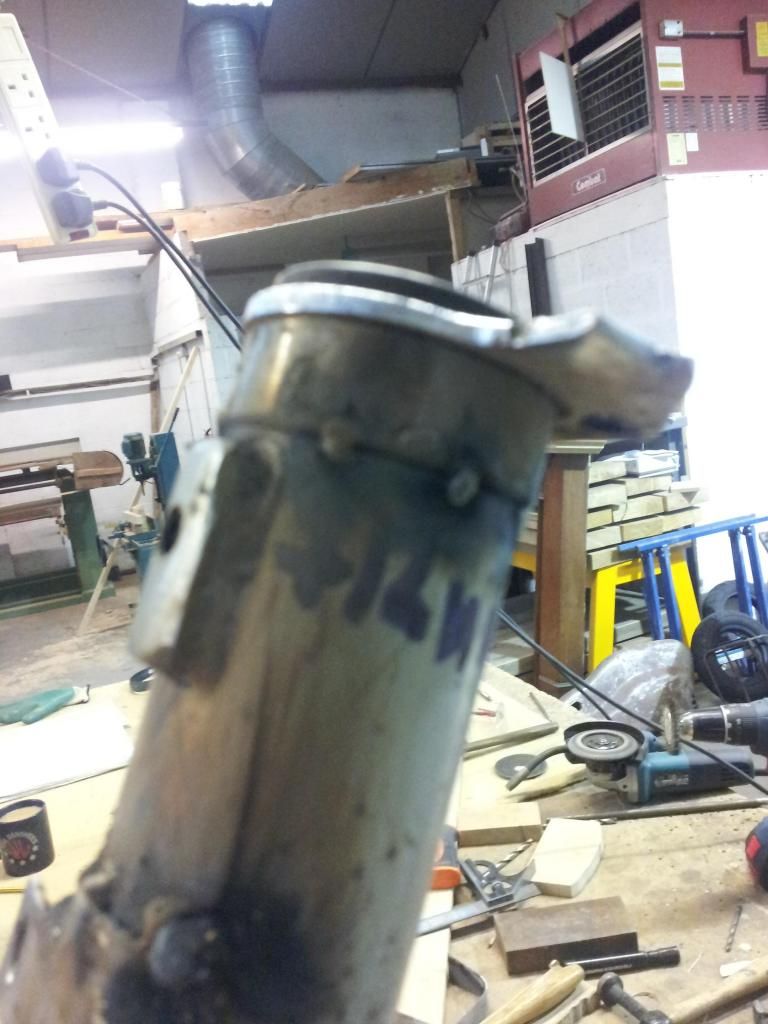
So this in turn, meant the forks were 12mm too short, but also the LD fork are threaded all the way up to the top unlike the s3 forks i had. If i used the S3 forks the LD handle bar clamp is a very sloppy fit as the diameter is reduced. So out with the grinder again and its cut and shut time. Luckily i had a piece of tube the same size and the id of the fork tube , and just needed a smidge off on the lathe for a snug fit :)

Image
Image
Image
When i was young my Mom said "if you haven't got anything nice to say, say nothing at all " ..................... and people wonder why I'm quiet around them !
User avatar
DigDug
registered user
Posts: 788
Joined: Wed May 02, 2012 1:00 pm
Main scooter: Lambretta
Location: Stroud
Contact:

8-)
Did you have to do that?
User avatar
carlos fandango
registered user
Posts: 792
Joined: Wed Jan 07, 2009 12:51 am
Location: Stourbridge
Contact:

A bit more work.

I made a start on the seat catch. Take one 10mm coach bolt and one clutch spring :)

Image
Image

And a steel bracket some nut and a split pin :)
Ok its a little "agricultural" and needs a bit of refining :) but it works and with a seat cover on ............
Image

And a bit of work on the panels. Fill the holes up, ready for panel clips.
Image

And a bit of mesh for the vent holes
Image
When i was young my Mom said "if you haven't got anything nice to say, say nothing at all " ..................... and people wonder why I'm quiet around them !
gerryjunior
registered user
Posts: 291
Joined: Sat Jul 31, 2010 8:53 pm
Xbox live gamer tag: no
Playstation gamer tag: no
Main scooter: lambretta li 2
Contact:

seat catch is a nice touch, cleaver thinking,
User avatar
carlos fandango
registered user
Posts: 792
Joined: Wed Jan 07, 2009 12:51 am
Location: Stourbridge
Contact:

Not had too much time on it recently :cry: but did a little bit.
Converted the panels to to clip on type, with some parts donated by Mr T :) thx
A little bit of reshaping
Image
and a channel welded to the panel
Image
Hoping to have a few more hours on it on Monday :D
When i was young my Mom said "if you haven't got anything nice to say, say nothing at all " ..................... and people wonder why I'm quiet around them !
User avatar
double h
registered user
Posts: 153
Joined: Sat Nov 15, 2014 12:29 am
Main scooter: SIL GP 200
Location: Dumfries SW Scotland
Contact:

carlos fandango wrote:Next up was the leggies
Image
They had a a bit of tin worm in a could of areas, this part being the worse one , i thought i could build up with weld and grind back to shape, but one touch with the welder just blew an even bigger hole :(
Image
A patch repair was the only solution. so a piece of steel , a bit of bar, piece of Oak and a hammer.
Image
Half an hour later
Image
And another half hour :)
Image

My welding is getting better (slightly) with practise . I brought myself a new welding helmet , so i can see what im doing now 8-) and i dont have to keep looking away :)
Clean, shiny metal is key for the mig ;) .Awesome project!!
User avatar
carlos fandango
registered user
Posts: 792
Joined: Wed Jan 07, 2009 12:51 am
Location: Stourbridge
Contact:

Cheers Double H

Ive got as far as i can now with just spending my time on it, ive now got to start spending money now buying parts :( but looking forward to getting it built now :) I still havent got a paint scheme in mind ,so i think im just going to cover it in acf50 and get it on the road :D
Image
Image
When i was young my Mom said "if you haven't got anything nice to say, say nothing at all " ..................... and people wonder why I'm quiet around them !
User avatar
carlos fandango
registered user
Posts: 792
Joined: Wed Jan 07, 2009 12:51 am
Location: Stourbridge
Contact:

Ive done a bit more on it over the last couple of weeks
Petrol tank needed extending. So out with the grinder, and a quick mock up to see how big i can go.
Image

I settled on 65mm , cut a band and formed it by hand and eye, tacked it together and then got a welder to do a proper job on it.
Image
Image

After an initial pressure test found two pin holes, got those fixed and now holds 5psi :)

Fits a treat, extended the fuel tap rod by the same amount as well.
Image
When i was young my Mom said "if you haven't got anything nice to say, say nothing at all " ..................... and people wonder why I'm quiet around them !
Post Reply Previous topicNext topic
  • Information
  • Who is online

    Users browsing this forum: No registered users and 1 guest