
removing the lettering first then sandblasting will remove and scrape marks, hmm Im liking that, maybe something to give a go
my first ever scooter build. cagiva mito 125 engine
-
tonydevon
- registered user
- Posts: 553
- Joined: Wed Jun 08, 2011 12:26 pm
- Main scooter: '71 GP125
- Location: Northam, Devonshire
- Contact:
haha I was kind of thinking that direction, not sure if it was on here or my facebook page, but I had mentioned an idea with the lens, your comment might make it even better, I love sandblasting the lens, it gives a great matt finish.
removing the lettering first then sandblasting will remove and scrape marks, hmm Im liking that, maybe something to give a go
removing the lettering first then sandblasting will remove and scrape marks, hmm Im liking that, maybe something to give a go
heavy is good, heavy is reliable, and if it does fail, hit them with it!!!
-
tonydevon
- registered user
- Posts: 553
- Joined: Wed Jun 08, 2011 12:26 pm
- Main scooter: '71 GP125
- Location: Northam, Devonshire
- Contact:
getting some ridiculous current drain figures, guess its to do with accumalative drop across the LED's?
I had just assumed that I could work out the numbers on paper and it be right
power supply readout was of little use as its so low, so I borrowed the Fluke tester from work
13.8vDC and its pulling 113mA
what I expect I will be using as the tail light setting is running at 24mA LOL LOL
I had just assumed that I could work out the numbers on paper and it be right
power supply readout was of little use as its so low, so I borrowed the Fluke tester from work
13.8vDC and its pulling 113mA
what I expect I will be using as the tail light setting is running at 24mA LOL LOL
heavy is good, heavy is reliable, and if it does fail, hit them with it!!!
-
tonydevon
- registered user
- Posts: 553
- Joined: Wed Jun 08, 2011 12:26 pm
- Main scooter: '71 GP125
- Location: Northam, Devonshire
- Contact:
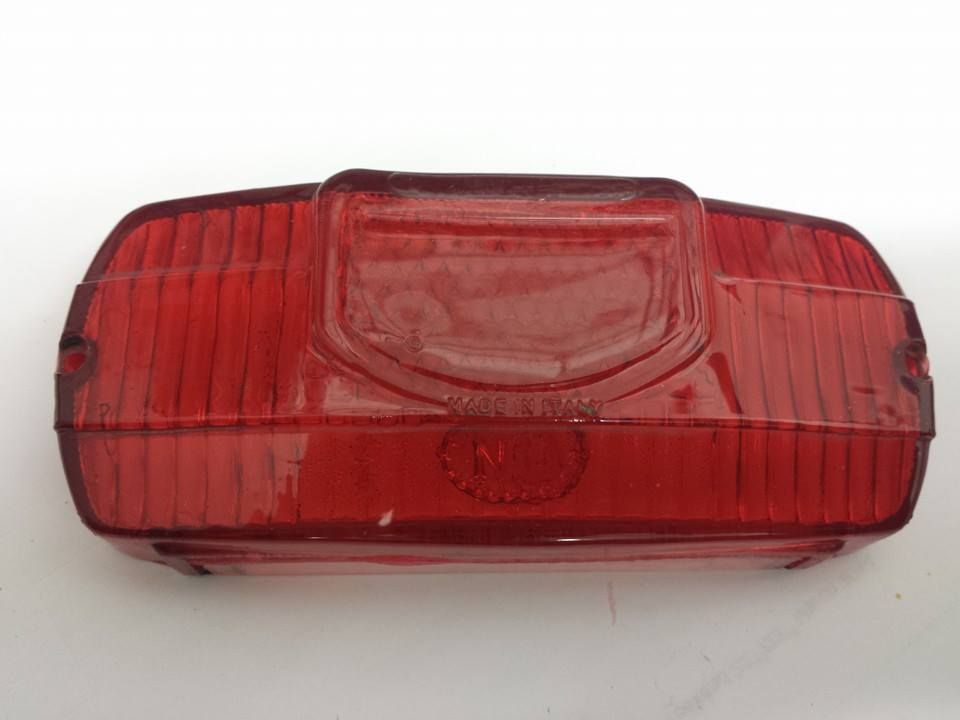
ok sharkman its all your fault LOL
shaved it all off minus the made in italy.
then polished it, looks good.
subtle but I know its done, thanks for sharing the idea, dont think Im going to sandblast it now, after polishing it, it looks very different
shaved it all off minus the made in italy.
then polished it, looks good.
subtle but I know its done, thanks for sharing the idea, dont think Im going to sandblast it now, after polishing it, it looks very different

heavy is good, heavy is reliable, and if it does fail, hit them with it!!!
-
tonydevon
- registered user
- Posts: 553
- Joined: Wed Jun 08, 2011 12:26 pm
- Main scooter: '71 GP125
- Location: Northam, Devonshire
- Contact:
today at lunch i also drilled and tapped the rosejoints that Im going to use for making the gear change linkages, hopefully start getting some pics of them up soon
got all the powervalve system working now, jetting is a mile off, but soon as the gear change setup is done Im going to give it a spin round the carpark, Im buzzing like a kid in a sweetshop
got all the powervalve system working now, jetting is a mile off, but soon as the gear change setup is done Im going to give it a spin round the carpark, Im buzzing like a kid in a sweetshop
heavy is good, heavy is reliable, and if it does fail, hit them with it!!!
-
tonydevon
- registered user
- Posts: 553
- Joined: Wed Jun 08, 2011 12:26 pm
- Main scooter: '71 GP125
- Location: Northam, Devonshire
- Contact:
Ok i give up photos keep getting chopped in half grrrrrr
Just a quick mockup of gear change linkage. I decided to make this quite a visible part instead of hiding it.
Just a quick mockup of gear change linkage. I decided to make this quite a visible part instead of hiding it.
heavy is good, heavy is reliable, and if it does fail, hit them with it!!!
-
Minority
- registered user
- Posts: 673
- Joined: Wed Feb 01, 2012 2:00 pm
- Main scooter: Li230 S3
- Location: Perth, Western Australia
- Contact:
Near the top of each page is a pull down box titled "style".tonydevon wrote:Ok i give up photos keep getting chopped in half grrrrrr
Just a quick mockup of gear change linkage. I decided to make this quite a visible part instead of hiding it.
If it's set to "prosilver" try changing it to "subsilver2" and see if that helps with the picture problem.
loving the build by the way!!

-
tonydevon
- registered user
- Posts: 553
- Joined: Wed Jun 08, 2011 12:26 pm
- Main scooter: '71 GP125
- Location: Northam, Devonshire
- Contact:
http://s74.photobucket.com/user/tony-de ... k.mp4.html
This is my led board in use. Only 12.3v at that battery. Its setup to work on 14.2v as per my charging output so will be bit brighter. Im happy with it anyway
Thanks. Changed the setting as you advised and all good now
This is my led board in use. Only 12.3v at that battery. Its setup to work on 14.2v as per my charging output so will be bit brighter. Im happy with it anyway
Thanks. Changed the setting as you advised and all good now
Last edited by tonydevon on Wed Feb 19, 2014 3:42 pm, edited 2 times in total.
heavy is good, heavy is reliable, and if it does fail, hit them with it!!!

Glad you are happy with the finished product would have been gutted if you had gone to the trouble and had to bin it lol I like it too makes an off the shelf item turn into a custom item with the only cost being a smear of elbow grease. The devil is in the detailtonydevon wrote:ok sharkman its all your fault LOL
shaved it all off minus the made in italy.
then polished it, looks good.
subtle but I know its done, thanks for sharing the idea, dont think Im going to sandblast it now, after polishing it, it looks very different
-
tonydevon
- registered user
- Posts: 553
- Joined: Wed Jun 08, 2011 12:26 pm
- Main scooter: '71 GP125
- Location: Northam, Devonshire
- Contact:
thats my thoughts exactly, I been building custom bikes and trikes for years, I despise seeing megabucks billet barge chops with gash wiring on show, such a simple thing to do but its nearly always the reason a bike doesnt look perfect, I love the subtle tweaks that nobody notices, generally they dont notice it because its not impressive, they dont notice it because it looks so right
I have to hold my hand up and say I had never heard of or even thought of doing that to the lens, I liked it cut down, but really like it with writing removed, I left the made in italy just as a bit of a joke, only thing italian on this build is the engine, and thats not lambretta LOL
while messing about working out gear linkage I had a right giggle at a small discovery, I needed a lever to use the spline from to mount onto the cagiva gear change spline
picked up an innocenti one that was lain on the bench, and its a damn perfect fit LOL
so that gets cut and welded tonight hopefully, need to get my finger out and get this built pronto, fast running out of time
heavy is good, heavy is reliable, and if it does fail, hit them with it!!!