Spirito di Sei Giorni (Spirit of Six Day)

If you want to tell us about or ask about a standard spec or restoration project....post it here.
User avatar
ArmandTanzarian
registered user
Posts: 1103
Joined: Wed Jan 07, 2009 6:26 pm
Location: Kent
Contact:

ArmandTanzarian wrote:
soullad wrote:one of the best threads of the year, keep the pics coming. Looking forward to seeing the finished scoot cos I have no doubt whatsoever its gonna be a stunner.
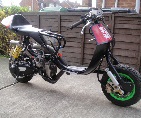
At the moment I'll be pleased if it goes in a straight line!

Just had a call......

Sorted!

Thank f**k for that! :D
Meus Lambretta est non infractus. Is est quietus.
User avatar
mad-bry
registered user
Posts: 30
Joined: Wed Jan 07, 2009 6:46 pm
Location: Maidstone
Contact:

Come on Mr Frank, get some more photos up on here!
User avatar
ArmandTanzarian
registered user
Posts: 1103
Joined: Wed Jan 07, 2009 6:26 pm
Location: Kent
Contact:

Progress!
Forks in
Image

Disk brake fitted (mostly)
Image

Side panels cut and fitted and fan cover modified to look more or less correct
Image

Image

Headset modified
Image

The scary part comes when I get it back from the genius doing the hard stuff and have to resume work on it myself.
Meus Lambretta est non infractus. Is est quietus.
User avatar
RICSPEED
registered user
Posts: 3334
Joined: Sun Jan 04, 2009 11:30 pm
Location: YORK

looking good :D
Its in bits scooter club: www.facebook.com/groups/132415046859320
GLscoot
registered user
Posts: 805
Joined: Thu Mar 15, 2012 10:05 pm
Main scooter: Vespa GS150
Contact:

What carburettor are you using, air filter, choke ect.
Gary
User avatar
ArmandTanzarian
registered user
Posts: 1103
Joined: Wed Jan 07, 2009 6:26 pm
Location: Kent
Contact:

GLscoot wrote:What carburettor are you using, air filter, choke ect.
Gary
Its all standard P200 at the moment.

If it fits I was going to go for a standard carb taken out to 26mm with a polini filter etc

http://www.sip-scootershop.com/en/produ ... e_20301520


Because my frame is a bitsa that's already been hacked about, I've no qualms about chopping bits off to make things fit.
Meus Lambretta est non infractus. Is est quietus.
GLscoot
registered user
Posts: 805
Joined: Thu Mar 15, 2012 10:05 pm
Main scooter: Vespa GS150
Contact:

The reason I asked, was if you were using a PHBH or similar carb it is best you don't have the sidepanel rubber going all the way around the panel. Reason for this is to allow as much air as possible into the carb.
Gary
GLscoot
registered user
Posts: 805
Joined: Thu Mar 15, 2012 10:05 pm
Main scooter: Vespa GS150
Contact:

Just looked at all the pictures on the thread, from the carb box, where does the air bellow fit to the frame & where is the choke lever on the frame, I only noticed one hole and I was assuming that was for the fuel tap.
Just a thought, on one of my previous conversions I used a motorcycle petrol tap. You have to weld a thread section into the tank, the petrol tap screws into this and has a very easy on off fuel tap. I used this method because the petrol tap for these models is rubbish and fuel leaks every where. SIP fast flow tap works but the fuel line connector is on the wrong side, I think. Best to check this out.
Gary
User avatar
ArmandTanzarian
registered user
Posts: 1103
Joined: Wed Jan 07, 2009 6:26 pm
Location: Kent
Contact:

Its hard to see in the photo but there is a second hole for the choke, the air bellows was never connected and the tap all seems to line up as is.

I know everything works because I drove the scoot regularly for a few years before I decided to rip it to bits.
Meus Lambretta est non infractus. Is est quietus.
GLscoot
registered user
Posts: 805
Joined: Thu Mar 15, 2012 10:05 pm
Main scooter: Vespa GS150
Contact:

it's the same as for a drum

Caliper mounting plate:

1. large thin o-ring
2. spacer (large flat washer)
3. caliper mounting plate (with bearings and seal installed)
4. spacer (flat washer, has a tab on the inner edge I think)
5. circlip

Hub (with disc, bearings and seal installed)
1. install while rotating to engage speedo gear (to the left I think)
2. install nut and tighten to 44-73 lb-ft
3. install cap and split pin
4. install cover
Post Reply Previous topicNext topic
  • Information
  • Who is online

    Users browsing this forum: No registered users and 28 guests

cron