Page 2 of 3
Re: Project Motovespa 150s (My Virgin Resto)
Posted: Thu Mar 06, 2014 12:52 pm
by GLscoot
Good project this.
With regards to striping the paint/rust ect, I started to do this myself. Hand grinder and wire wire brush attachment, its kinder to the body work and the harder to reach bits get it bead blasted. Its very therapeutic and satisfying. Whats your plans.
Re: Project Motovespa 150s (My Virgin Resto)
Posted: Thu Mar 06, 2014 3:14 pm
by cartmel808
Well - I can't lay claim to having done all of the work myself, as I outsourced the bodywork/painting & engine build to people who new what they were doing.....

But, I did all of the strip down & re-building work myself (got the skinned/scarred knuckles to prove it) - and for a total novice/numpty like me it's been a big undertaking & a steep learning curve!!
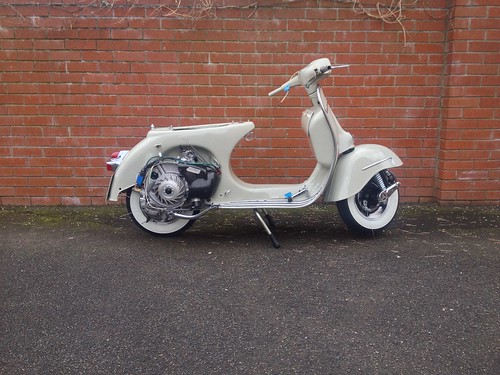
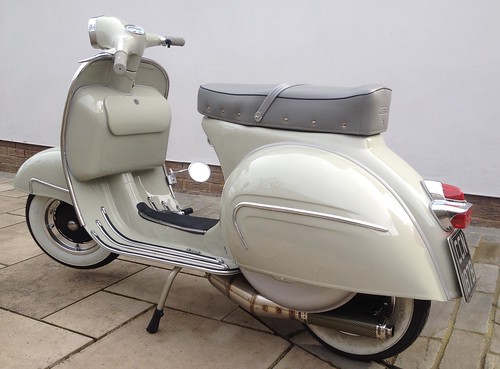
Decided on a single paint colour for the body, panels, ect - in an original Piaggio paint code from a 1957 Vespa 125n (max meyer 15048 'Gris') - which is listed as grey, but is more of a very light green.... and the fork, front suspension arm, hubs, wheels - ect were supposed to all be in 'matt' black - but they came back from the painter in 'satin' black??.... The satin black finish didn't have the desired effect that I had in mind - so I decided to swap the wheel rims for polished ali items, and change a couple of other front end components for polished/chromed bits, to break-up the satin black a little... Still not 100% happy with it though - and may yet strip the front end back down & get it all re-done in 'matt' black!

.......
 005
005 by
dent.graham, on Flickr
 004
004 by
dent.graham, on Flickr
 003
003 by
dent.graham, on Flickr
 004
004 by
dent.graham, on Flickr
.....And following the front end repairs to straighten everything back up - the big nasty weld from the previous repair has now gone, and the original factory seam has been re-instated...

 001
001 by
dent.graham, on Flickr
 002
002 by
dent.graham, on Flickr
Re: Project Motovespa 150s (My Virgin Resto)
Posted: Thu Mar 06, 2014 5:09 pm
by cartmel808
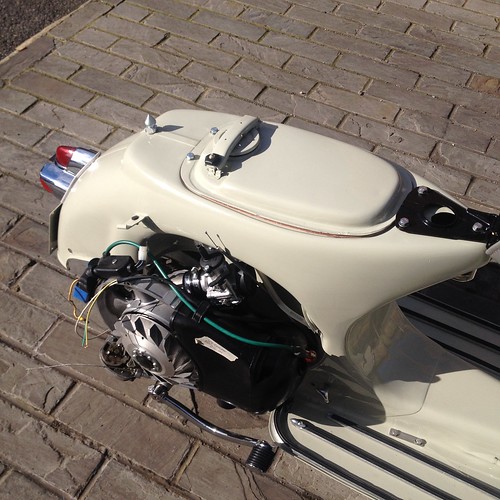
Decided to ditch the original 150cc 2port engine & upgrade to a modern PX unit.....
 015
015 by
dent.graham, on Flickr
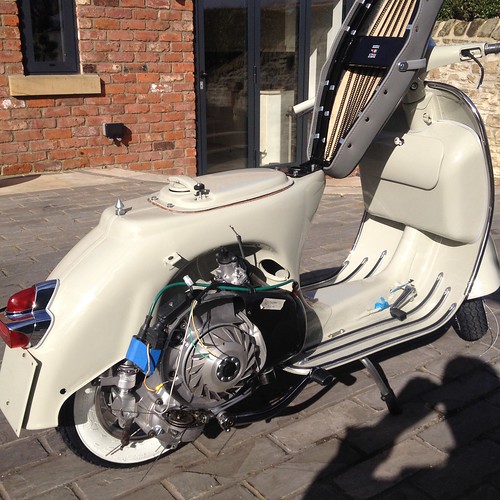 013 (2)
 by
dent.graham, on Flickr
 014
014 by
dent.graham, on Flickr
 012 (2)
 by
dent.graham, on Flickr
.....which is now a Polini 221 - built using brand new Malossi PX200 casings by Dan @ Scooterotica Garage...
Re: Project Motovespa 150s (My Virgin Resto)
Posted: Thu Mar 06, 2014 6:43 pm
by GLscoot
Apart from the rear hub, which I imagine you will get painted the same as the front hub, I think that looks excellent.
Re: Project Motovespa 150s (My Virgin Resto)
Posted: Thu Mar 06, 2014 7:51 pm
by cartmel808
Cheers Gary....
I bought a brand new rear hub for it, which I 'd had painted to match - but when I went to fit it, it wouldn't go onto the splines of the drive shaft....
It wasn't a genuine Piaggio item (F A Italia I think) - but it was supposed to be for a PX200 fitment! Anyway - I've sent the original one to be painted in matching satin black..
Still got a few little jobs to finish it yet - but not too far away now...
 005 (2)
 by
dent.graham, on Flickr
 010 (2)
 by
dent.graham, on Flickr
Re: Project Motovespa 150s (My Virgin Resto)
Posted: Thu Mar 06, 2014 8:23 pm
by vespaloco
lovely job,have a few of these in the workshop.Dont worry about the jigging there all twisted.
Re: Project Motovespa 150s (My Virgin Resto)
Posted: Mon Apr 14, 2014 11:24 am
by cartmel808
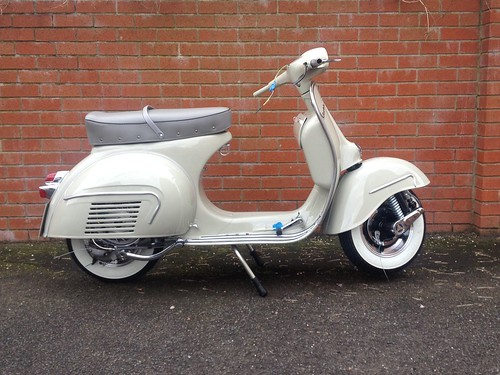
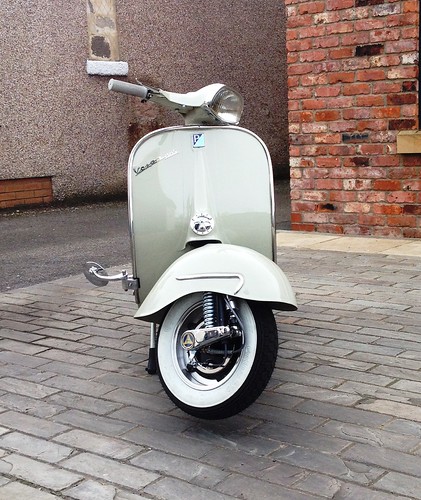
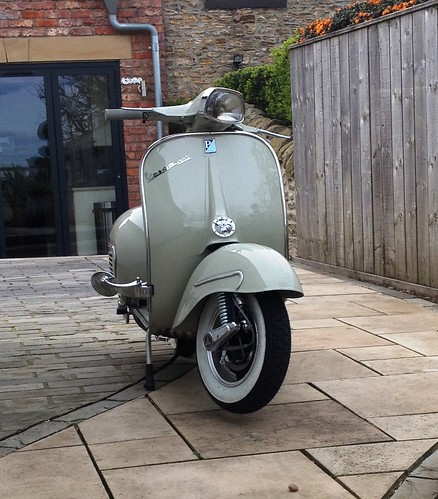
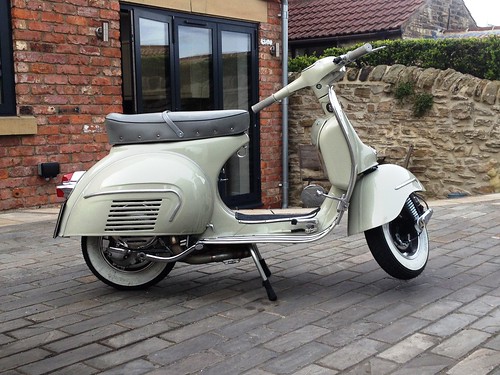
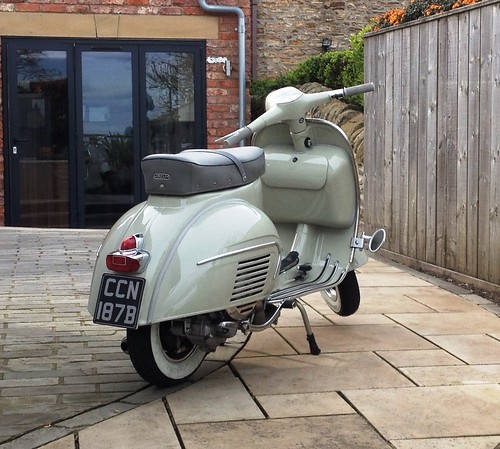
All Finished!!..... finally got everything plumbed/wired/buttoned-up - fired-up, running, MOT'd, DVLA'd - ect...
 016 (3)
 by
dent.graham, on Flickr
 021
021 by
dent.graham, on Flickr
 013 (3)
 by
dent.graham, on Flickr
 032
032 by
dent.graham, on Flickr
 035
035 by
dent.graham, on Flickr
 022
022 by
dent.graham, on Flickr
 005
005 by
dent.graham, on Flickr
 006
006 by
dent.graham, on Flickr
 009
009 by
dent.graham, on Flickr
Managed a few short shakedown runs over the weekend to check everything's working as it should - clocked-up just over 100 'gentle' miles, so the new motor's now 'run in' a bit - plus nowt fell off which was a bonus!!
Re-tensioned all of the cables & torqued everything back down last night - and its booked in for dyno session tommorow, to get everything dialed in & set-up proper....
Then am gonna thrash the t*ts off it - all the way to Whitby & back on Saturday & get all that 'shiney newness' covered in crap!....

Pics now Sorted!
Re: Project Motovespa 150s (My Virgin Resto)
Posted: Mon Apr 14, 2014 11:56 am
by Snapper
Beautiful scoot mate!

Great job!
Re: Project Motovespa 150s (My Virgin Resto)
Posted: Mon Apr 14, 2014 2:08 pm
by GLscoot
Excellent, good work. Running in is about 500miles of half throttle, then another 500 3/4 throttle, well thats what I am doing, might be a bit over cautious but want it run in properly. I would inform the dyno geezer what you have done so far.
gary
Re: *Finished*.... Project Motovespa 150s (My Virgin Resto)
Posted: Mon Apr 14, 2014 5:59 pm
by cartmel808
TBH Gary - Ive read so much conflicting info on what the running-in requirements are for a tuned ali/nicasil cylinder - that I'm not sure what's the best way to go...
A lot of people saying that, once set-up properly on a dyno - then the motor only really needs a steady 100 -150 miles or so, and away you go!.... But I'll take advice from the lads @ Scooterotica tomorrow, on what they recommend as the best way forward....
I dont want to f@@k the thing up for the sake of two or three hundred miles of steady riding - but at the same time - I just dont think I'd have the restraint required to nurse it for a thousand miles

You must have the patience of a saint mate...