Page 1 of 3
*Finished*.... Project Motovespa 150s (My Virgin Resto)
Posted: Wed Mar 05, 2014 10:55 pm
by cartmel808
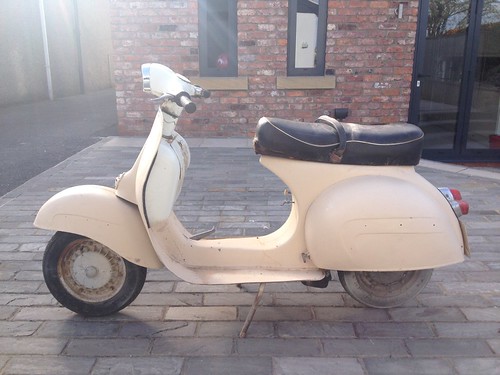
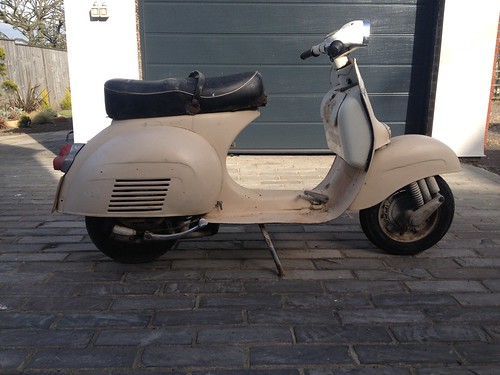
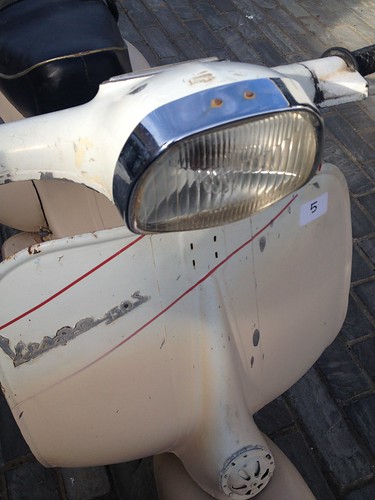
Decided I wanted to try my hand @ doing my own restoration - so after a short search, I bought this little 1965 Motovespa 150s last May, as a project to 'pop me cherry' on..
This is how it looked the day I got it home - original engine (non-runner), and mostly complete & original - bar some missing body trims, and having the added bonus of several top coats of brush applied household gloss!!??....
Re: Project Motovespa 150s (My Virgin Resto)
Posted: Wed Mar 05, 2014 11:02 pm
by cartmel808
How the f**k do you post pics on here!?...
Re: Project Motovespa 150s (My Virgin Resto)
Posted: Wed Mar 05, 2014 11:14 pm
by ArmandTanzarian
right click the image.
select copy image url.
Paste it in here
Select it
Click on the img button
Re: Project Motovespa 150s (My Virgin Resto)
Posted: Wed Mar 05, 2014 11:15 pm
by ArmandTanzarian
Except that doesn't work with Flickr
Re: Project Motovespa 150s (My Virgin Resto)
Posted: Wed Mar 05, 2014 11:19 pm
by ArmandTanzarian
But you can do it with a lot of mucking about viewing the source code of the Flickr page.
Very nice.
Re: Project Motovespa 150s (My Virgin Resto)
Posted: Wed Mar 05, 2014 11:37 pm
by cartmel808
Thanks.... I think?
Still haven't a clue how you did that - and I was planning to build up to that very image you've posted - so you kind of wrecked my plans for posting a whole threat of before/after images of the resto!!

I'm really shite with this social media malarkey....

Re: Project Motovespa 150s (My Virgin Resto)
Posted: Thu Mar 06, 2014 12:06 am
by cartmel808
Right - I'll try again.....
As I said.... Decided I wanted to try my hand @ doing my own restoration - so after a short search, I bought this little 1965 Motovespa 150s last May, as a project to 'pop me cherry' on..
This is how it looked the day I got it home - original engine (non-runner), and mostly complete & original - bar some missing body trims, and having the added bonus of several top coats of brush applied household gloss!!??....
 025
025 by
dent.graham, on Flickr
 IMG_0516
 by
dent.graham, on Flickr
 IMG_0518
 by
dent.graham, on Flickr
 027
027 by
dent.graham, on Flickr
 IMG_0524
 by
dent.graham, on Flickr
Re: Project Motovespa 150s (My Virgin Resto)
Posted: Thu Mar 06, 2014 12:34 am
by Juan
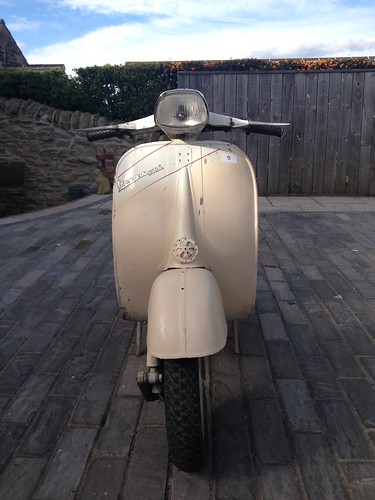
It looks a bit on the p155 to me, I'd want it jigged up.
Re: Project Motovespa 150s (My Virgin Resto)
Posted: Thu Mar 06, 2014 10:53 am
by cartmel808
Juan wrote:It looks a bit on the p155 to me, I'd want it jigged up.
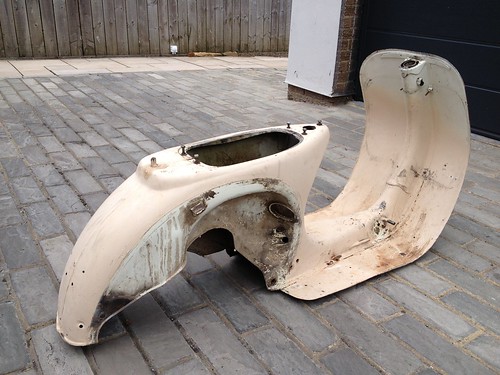
Your right -its was 'a bit on the p155' Juan....
Got it all disassembled & ready for paint removal - and standing over it, looking down @ the front end you could see that the leg shields were slightly offset to the rest of the body.

 073
073 by
dent.graham, on Flickr
 074
074 by
dent.graham, on Flickr
 075
075 by
dent.graham, on Flickr
 076
076 by
dent.graham, on Flickr]
 081
081 by
dent.graham, on Flickr
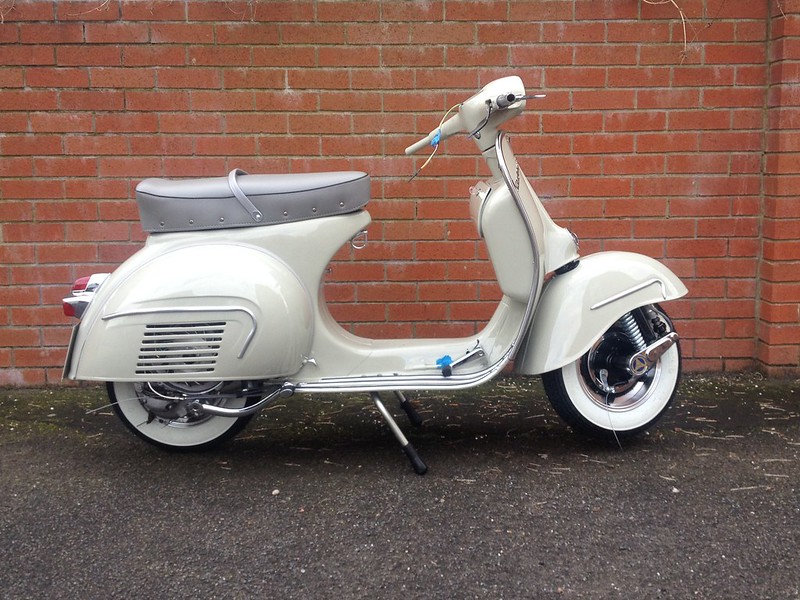
So before going any further I had the frame jigged - and it was found to be twisted around the base of the fork tube, so had to cut out an envelope @ the bottom of the fork tunnel, get it straightened & re-aligned, weld in some strengthening plates - and close it back up.... If you look closely @ pics 1+2 you can see a big nasty weld across where the original factory seam normally is - this is where the issue was. Now its all put back together properly, and the frame seam again looks like it did when it came out of the factory..

Everything sits nice & straight now & wheel alignment is spot on also..
Re: Project Motovespa 150s (My Virgin Resto)
Posted: Thu Mar 06, 2014 11:33 am
by cartmel808
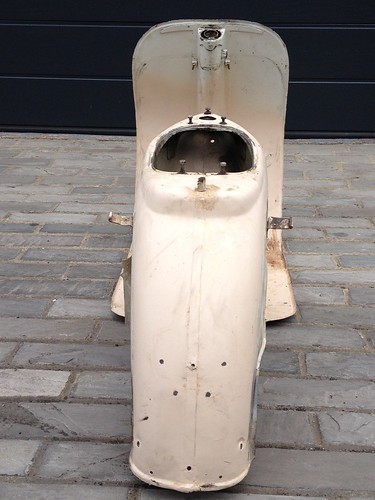
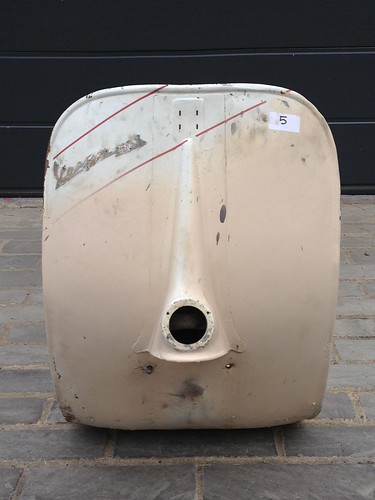
Sent some of the body panels away to be Chemically Dipped - got most of the paint off (there was at least 5-6 different coats - inc the original), but didn't really do a great job @ removing any surface rust.
 099
099 by
dent.graham, on Flickr
 101
101 by
dent.graham, on Flickr
 106
106 by
dent.graham, on Flickr
 104
104 by
dent.graham, on Flickr
 103
103 by
dent.graham, on Flickr
Anyway - my painter wasn't at all happy with the results achieved by the Chemical Stripping process - so he had everything sent away to be glass bead blasted, which got much better results...